

Sign up for CleanTechnica’s Weekly Substack for Zach and Scott’s in-depth analyses and high level summaries, sign up for our daily newsletter, and/or follow us on Google News!
In another recent post, I shared what I learned from going all-electric and taking my travel trailer off-grid for a week. Now, I want to explain to readers what it took to teach my older camper new tricks. It took a surprising amount of hard, intricate work to do this, and I’m not even done yet.
Paradigm Changes Aren’t Easy
Before I get into specifics of what I did, I want to share some quick background for people not familiar with RV technology.
The first problem is one of design assumptions. With the exception of some very new and very expensive trailers and motorhomes, they’re basically all built with fossil fuels in mind, even in 2025. This makes a lot of sense because the energy density of propane is a lot higher than that of batteries, so it has always taken up a lot less weight and space. And, more importantly, the cost of a propane tank is a lot lower.
My travel trailer had not only a gas furnace, but also had a gas stove, a gas oven, a gas water heater, and even a gas refrigerator. The microwave and air conditioner run on electricity, but those wouldn’t work unless you could plug the trailer in or run a generator. The 30-amp power cable was enough to basically run the microwave, air conditioner, and fridge when in electric mode (which alone pulled almost 500 watts!).
But, times are changing. In recent years, the cost and size of batteries has come down. Many people have not only replaced their old lead-acid batteries with lithium batteries of the same size, but also add more batteries to power everything off-grid. Solar panels are also now quite cheap, so it’s common to put them all over an RV’s roof to charge the batteries.
More recently, companies have been assembling everything needed for off-grid power into neat packages that we call “power stations” or “solar generators.” By combining battery cells, inverters, chargers, and everything else into one unit and selling it to people with varying needs, costs have come even further down. This has led many people to simply plug their RV into one of these units when off-grid.
Step One: Re-Wire The Trailer To Keep The Power Station Inside
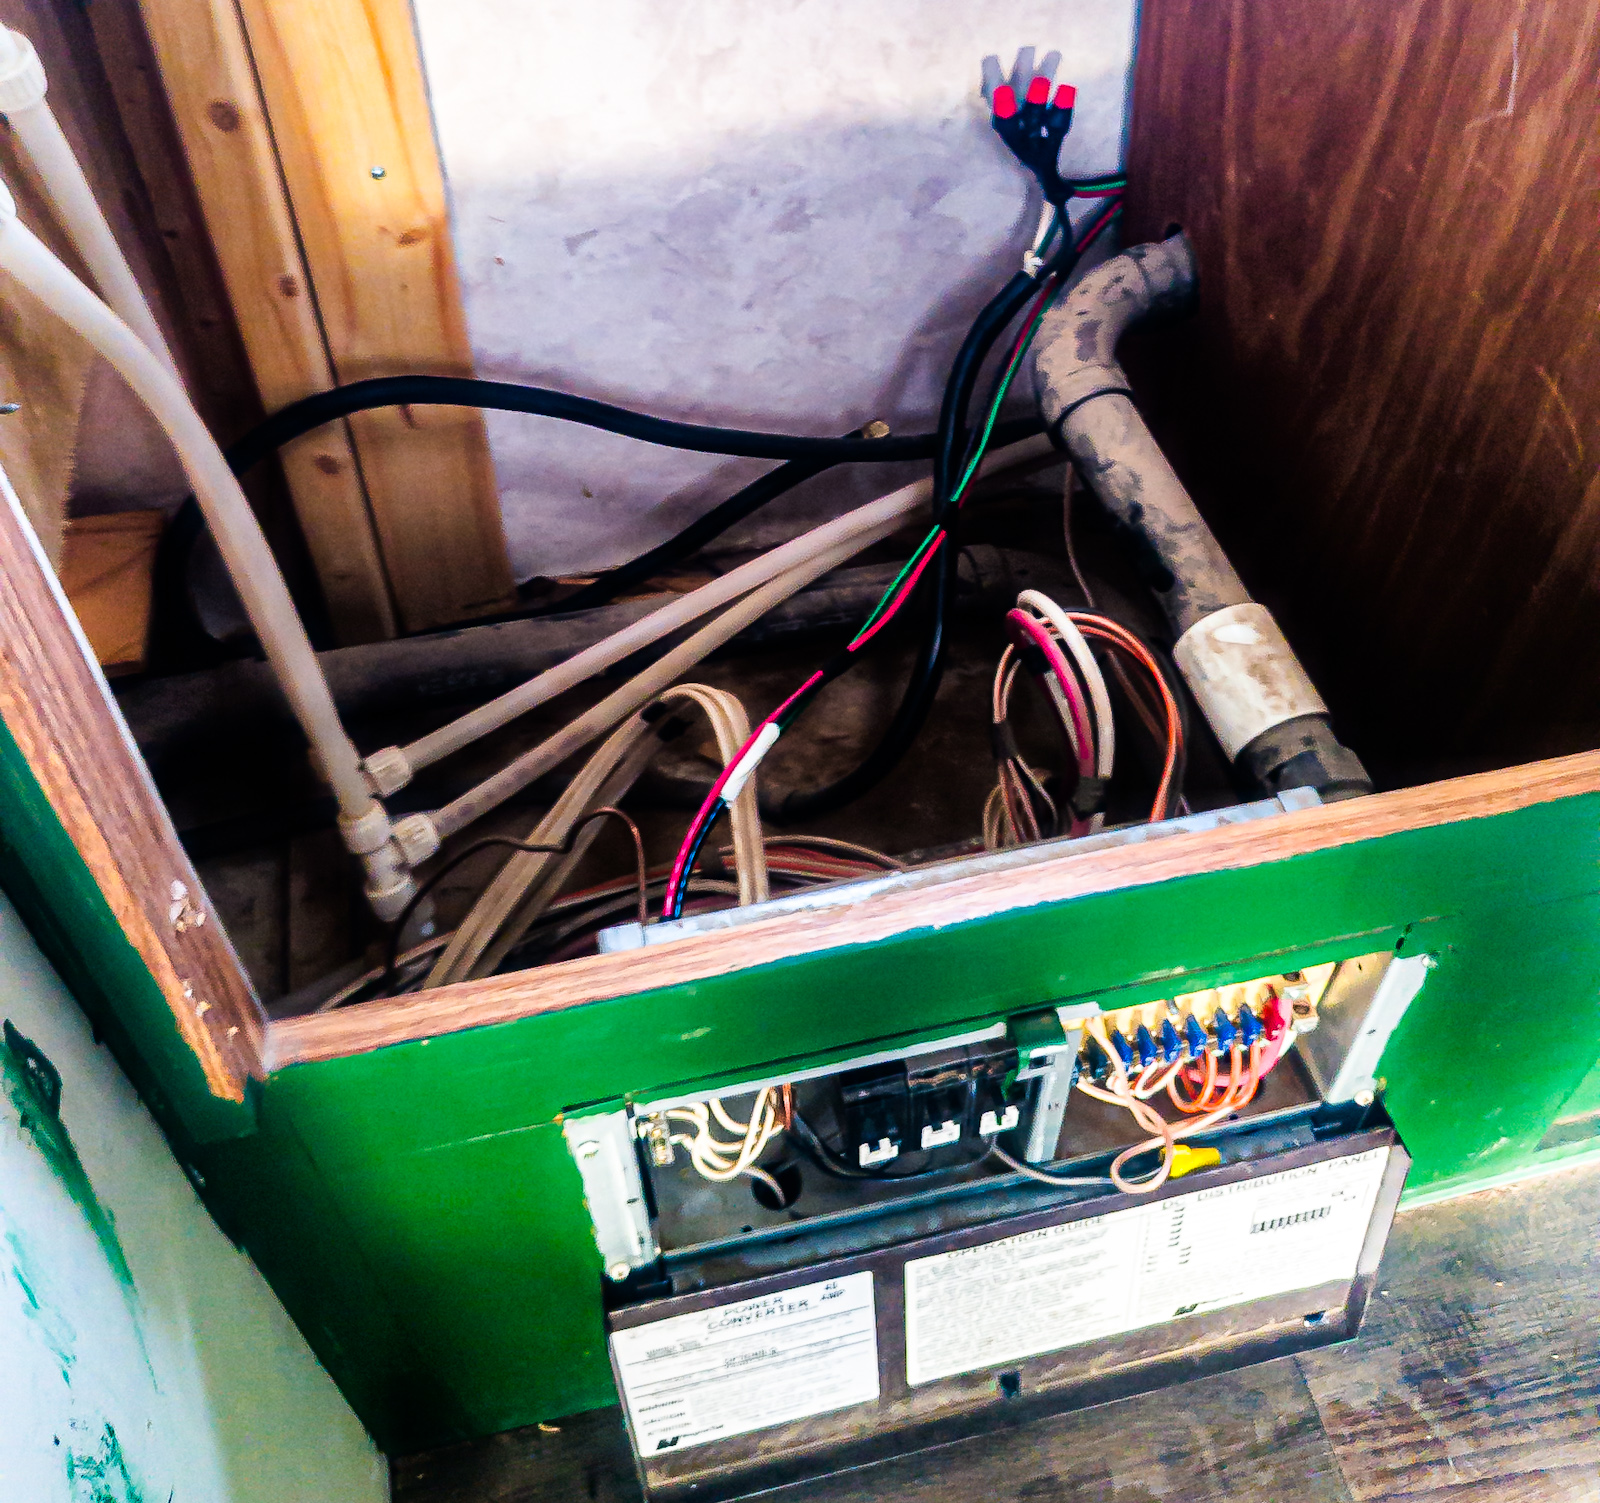
Yes, I know this picture sucks, but it shows what I had to do first: get in behind the breaker and fuse box to re-route the flows of electricity. After ripping out the gas stove and oven, I could easily access the cord coming in from outside to the electrical hub of the trailer.

After pulling the wiring out of the breaker box, I extended it (with some very expensive, thick wire from Home Depot) to the other end of the trailer and under the bed where I had fastened my EcoFlow Delta Pro 3 and extra battery down with D-rings and ratcheting straps. Then, I ran another extension back to the breaker box.

Next to the power station, the wire coming in from the outside ends in one NEMA TT-30 (standard travel trailer 30 amp) receptacle and two NEMA 5-20 receptacles. The wire going to the breaker box ends in a NEMA TT-30 plug, which can either be plugged into the receptacle to bypass the power station or be plugged into the power station to power the trailer.
I put in two more circuits using 15-amp Romex wire to power the new kitchen appliances directly from the power station, but these can also be powered at an RV park by plugging them into the 20-amp receptacles. Care must be taken to not run too many appliances at once in bypass mode, or the RV park’s breaker will trip.
Typically, though, I simply charge the power station using an RV park’s power and then power everything from the power station. Or, if I’m running too many loads (the Delta Pro 3 acts weird about charging AC and powering AC), I’ll bypass the 30-amp plug, keep the stove and toaster oven on the power station, and then set the power station to only charge with a few hundred watts to prevent breaker trips. This allows it to charge overnight while still letting me run AC, heat, the microwave, and the fridge directly on grid power.
Step 2: Install More Efficient Appliances

As I mentioned earlier, the factory fridge that was designed to run on propane or electric was just terrible about power consumption. It was OK to run on propane (assuming it didn’t get its flame blown out going down the road or park anywhere unlevel), but to run on electric, it needed over 400 watts of power to make heat that it would use to make cold.
So, I bought a more efficient compressor fridge from Walmart that only uses about 50 watts on and off once it’s cooled down. It also has more room for food! It still needs a better mounting job and some trim work, but baby latches have kept the food inside going down the road.

In the kitchen, I replaced the gas range/oven with an induction cooktop from Amazon and a toaster oven I already had kicking around from my last trailer build. These were both mounted with recycled wood and the toaster oven is kept in place with a ratcheting strap. Both of these appliances are powered by their own circuits directly from the power station, as described earlier.
Sadly, a demand electric water heater I bought doesn’t seem to be working properly, so I’m still working on hot water. I’ll update readers once I figure all that out. For now, I’m relying on RV park and truck stop showers (which are actually pretty good).
A More Sustainable Toilet
I’ve written a number of articles about toilets and sewers in the past, and I decided to practice what I’ve preached. Instead of letting the #1 and the #2 mix in a nasty tank under the camper and then needing to worry about places to dump the toxic mess, I found a way to install my Trelino composting toilet in place of the stock toilet.
After removing the factory toilet and blocking the black tank off, we simply added some scrap 2×4 boards to create a little wall around the base of it. It stays put going down the road, but can still be picked up for emptying and cleaning (those are scuffs on the side in the photo).

Unlike conventional home or RV toilets, the Trelino funnels the pee into one place and the poop into another place. The pee goes into a storage tank, and you sprinkle something like coconut shavings or peat moss onto the poop, and neither stinks. The poop bag can safely go into any dumpster or trash can (like diapers do), and the pee can be dumped into a campground toilet or diluted and used to water plants.
Not only do I avoid the nastiness of hooking up sewer lines and the hassles of finding dump stations, but I also greatly reduce the environmental impact of using the trailer.
It Works Pretty Well
While there are still some minor kinks to work out and improvements to be made (like permanently mounting the solar panels to be more consistent), I’m very happy with this setup so far. Not only is it cleaner, but I’m avoiding some common RV hassles. I never have to go find a place to fill or swap propane bottles, and I never have to look for a dump station.
There really are no downsides so far!
All images by Jennifer Sensiba.


Whether you have solar power or not, please complete our latest solar power survey.

Have a tip for CleanTechnica? Want to advertise? Want to suggest a guest for our CleanTech Talk podcast? Contact us here.
Sign up for our daily newsletter for 15 new cleantech stories a day. Or sign up for our weekly one on top stories of the week if daily is too frequent.
CleanTechnica uses affiliate links. See our policy here.
CleanTechnica’s Comment Policy